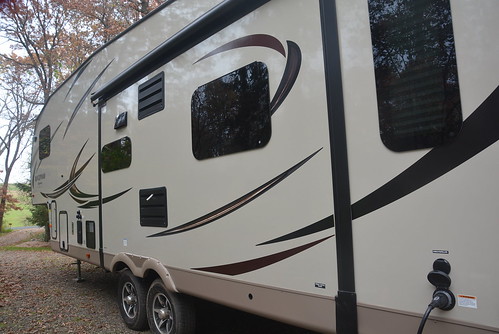
There’s nothing more magical than setting up camp and enjoying the great outdoors with your RV, your home away from home. One of the RV’s best features is its water tank. Whether you’re washing your hands, taking a shower, or cooking, water is essential, and having it readily available in the middle of nowhere is a real plus.
However, there may be times when you need to drain your RV’s fresh water tank, such as when you want to clean it or reduce your RV’s weight for towing. Knowing how to carry out this process is essential for all RV owners. Below are the steps you can follow to help you successfully accomplish this process.
How To Drain an RV Fresh Water Tank
Draining your RV’s fresh water tank should be straightforward if it’s done correctly and with care. From start to finish, it’ll typically take you 30 minutes at most. It’s one of the easiest RV maintenance tasks, and simpler than draining the black or grey water tanks that require access to a sewer hookup or portable tank to dispose of waste.
There are no specific rules or regulations on how or where you should drain your RV’s fresh water tank. However, when emptying it, it’s important to use your common sense and be environmentally conscious and considerate of those around you. Always ensure you’re not leaving a mess behind or disrupting others in the vicinity, whether they are other vehicles, campers, or pedestrians.
Below are the steps to follow when draining your RV’s fresh water tank:
Step 1: Prepare Your RV for Draining
Park your RV in a safe and suitable spot. Ideally, you’ll want to have your vehicle on a ramp of equal height to facilitate drainage. To secure your RV, apply the parking brakes and place a physical barrier, such as a chock, behind the rear tires to prevent it from moving.
It’s also important to ensure there’s enough room beneath your RV. This space will allow you to place a container under the drain outlet and will also allow you to move around comfortably while doing so.
Step 2: Turn Off the Water Supply
Before you start emptying the tank, turn off the main water-supply valve or, if connected, disconnect the hose from the city water hookup. This step prevents any residual water from entering the tank while draining it.
Step 3: Open All the Faucets and Taps
To drain most of the water from the tank, you need to open all the RV’s faucets and taps. This includes the faucets in the shower, kitchen, and bathroom. Ideally, you want to capture this water so that you can use it for routine tasks, such as cleaning your floors or watering your garden, thereby avoiding waste. When no more water is coming out of the faucets, you can assume that the tank is nearly empty. At this point, you should close all the faucets and proceed to the next step.
Step 4: Locate and Open the Drain Valve
After closing all the faucets, you need to locate your fresh water tank’s drain valve or petcock. It’s usually at the bottom of the tank. If you’re having trouble finding it, refer to your RV’s owner’s manual or look for a version of the handbook online. When you open this valve, it allows the residual water in the system to pour out. Be careful, as the water may flow out at a high speed. You can place a bucket under the outlet to collect the water.
Step 5: Open the Low-Point Drain Valves
This step requires you to empty the water in the RV’s drain lines. To do this, you’ll need to twist open the low-point drain valves that you’ll find near the main drain valve. This step only takes a few minutes but is crucial, as it ensures that there’s no more water in your RV’s plumbing system.
Step 6: Check the Water Level
After you’ve opened the low-point drain valves, check the water level to confirm that you’ve completely drained your RV’s fresh water tank. To do this, you can either look inside the water tank or check the transparent scale on its side. By taking the time to verify this, you can avoid potential issues due to water stagnating in the system.
When To Drain Your Fresh Water Tank
You’ve learned how to empty your RV’s fresh water tank for long-term storage. But now you may be wondering how often you should do it. The frequency depends on your RV usage. If you’re actively using your RV, we highly recommend draining and refilling the fresh water tank at least every two weeks to ensure the water stays clean. If you’re planning on storing your RV or won’t be using it for some time, it’s best to drain the tank completely to avoid leaving water in the system, as it could lead to bacterial or algae growth.
If you suspect that your water is no longer potable, or if it has an unusual taste or odor, drain the tank immediately and sanitize the system using specific RV water system sanitizers before refilling it. For sporadic RV users, it’s good practice to drain the tank after each trip, especially if your next adventure is some way off. At the very least, drain and sanitize the tank at the beginning and end of each camping season.
Ready To Hit the Road?
Now that you know how to properly drain your RV’s fresh water tank, you can confidently plan your next adventure. By following these simple steps, you can maintain the quality of your RV’s water supply and ensure a safe and enjoyable trip every time. If you’re in the market for a new or pre-owned RV, Bretz RV & Marine’s dealerships in Idaho and Montana offer a wide selection of high-quality options. Plus, we offer flexible financing to make your dream of owning an RV a reality. Contact us or visit our website today to learn more.
camper by Iain is licensed with CC BY-SA 2.0 DEED
